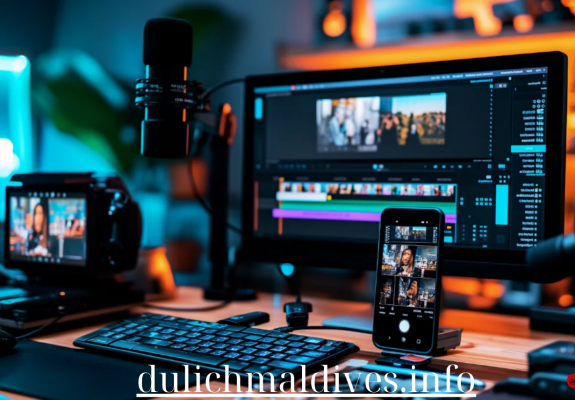
Creating high-quality videos that captivate and engage audiences requires more than just a good camera. It involves a combination of technical skills, creativity, and attention to detail. Whether you’re shooting content for social media, marketing campaigns, or personal projects, understanding the key techniques for capturing stunning visuals can elevate your videos to a professional level. This guide covers essential tips for achieving visually compelling results in your video projects.
1. Use Proper Lighting
Lighting plays a crucial role in video quality. Poor lighting can make your footage look grainy or flat, while good lighting enhances detail, color, and clarity.
a. Natural Light
When possible, take advantage of natural light, especially during the golden hour (early morning or late afternoon) when sunlight is soft and warm. Place your subject facing the light source to avoid harsh shadows and ensure a balanced look.
b. Artificial Lighting
If shooting indoors or in low-light conditions, consider using softbox lights or ring lights to create even, diffused lighting. Avoid direct overhead lighting, which can create unflattering shadows, and experiment with three-point lighting to add depth and dimension to your subject.
c. Lighting for Mood
Use lighting to set the tone of your video. Bright, well-lit scenes work well for upbeat or educational content, while low-key lighting with shadows can create a more dramatic or intimate feel.
2. Stabilize Your Camera
Shaky footage can detract from the overall quality of your video. To capture smooth, professional-looking shots, it’s essential to stabilize your camera.
a. Tripods
Using a tripod is one of the easiest ways to achieve stability. It keeps your camera steady, allowing for cleaner and more consistent shots, especially in static scenes.
b. Gimbals
For dynamic shots that involve movement, consider using a gimbal. Gimbals help stabilize your camera while you move, resulting in smooth, cinematic footage even when walking or panning.
c. Handheld Techniques
If a tripod or gimbal isn’t available, practice holding your camera with both hands and keeping your elbows close to your body to reduce shake. Move slowly and smoothly when panning or tracking a subject.
3. Frame Your Shots with Intention
Composition is key to creating visually appealing videos. Thoughtful framing can guide the viewer’s eye and add impact to your shots.
a. Rule of Thirds
The rule of thirds is a fundamental principle in visual composition. Imagine dividing your frame into a 3×3 grid. Place your subject along these lines or at the intersection points to create balance and make the shot more interesting.
b. Leading Lines
Incorporate leading lines into your compositions to draw attention to your subject. These can be natural elements like roads, rivers, or buildings that lead the viewer’s eye toward the focal point.
c. Symmetry and Balance
Symmetry can create visually pleasing shots, especially when capturing architecture or landscapes. Balance your compositions by considering the weight of objects in the frame and ensuring no one side feels too heavy.
4. Focus on Audio Quality
Clear, high-quality audio is just as important as stunning visuals. Poor audio can distract viewers and undermine the professionalism of your video.
a. External Microphones
Built-in camera microphones often pick up background noise and lack clarity. Use an external microphone such as a shotgun mic or lavalier mic to capture crisp, focused audio. For interviews or dialogue, lavalier mics clipped to the speaker’s clothing work well, while shotgun mics are ideal for directional sound.
b. Monitor Audio Levels
Pay attention to your audio levels while recording. Most cameras and audio devices allow you to monitor sound levels, ensuring your audio doesn’t peak or become distorted.
c. Minimize Background Noise
Choose quiet locations for filming whenever possible. If you’re filming outdoors or in a noisy environment, use windshields or noise-reducing equipment to minimize unwanted sounds.
5. Master Camera Settings
Understanding your camera’s settings gives you greater control over your footage, resulting in higher-quality visuals.
a. Frame Rate
Choose the appropriate frame rate for your project. A standard frame rate of 24 frames per second (fps) gives your video a cinematic feel, while 30 fps is more suited for live broadcasts or vlogs. For slow-motion effects, shoot at higher frame rates like 60 or 120 fps.
b. Shutter Speed
Your shutter speed should typically be double your frame rate for natural-looking motion. For example, if you’re shooting at 24 fps, set your shutter speed to 1/48 or 1/50. Faster shutter speeds can create a choppier, more dramatic effect, while slower shutter speeds may cause motion blur.
c. Aperture and Depth of Field
Adjust your aperture (f-stop) to control the depth of field in your shots. A low f-stop (e.g., f/1.8) creates a shallow depth of field, blurring the background and making the subject stand out. A higher f-stop (e.g., f/11) keeps more of the scene in focus, which is useful for landscapes or wide shots.
d. ISO Settings
Keep your ISO as low as possible to avoid grainy footage, especially in well-lit environments. Only increase ISO in low-light situations when necessary, and balance it with aperture and shutter speed adjustments to maintain exposure.
6. Experiment with Camera Angles and Movements
Different angles and camera movements can add visual interest and dynamism to your videos.
a. Low and High Angles
Changing the height of your camera can shift the viewer’s perspective. Low angles can make a subject appear more powerful or dramatic, while high angles can create a feeling of vulnerability or offer a broader view of the scene.
b. Tracking Shots
Move the camera to follow the action or subject for dynamic shots. Tracking shots can be done with a gimbal, dolly, or even handheld, as long as the motion is smooth and intentional.
c. Zooming
Instead of using digital zoom, which can reduce image quality, opt for optical zoom or physically moving closer to your subject. If you want to incorporate zooming for stylistic purposes, practice smooth zooming techniques.
7. Plan for Post-Production
Capturing high-quality footage is just the beginning. Planning for post-production can enhance your visuals even further.
a. Shoot in RAW or High-Resolution Formats
Whenever possible, shoot in RAW or the highest resolution your camera allows, especially for professional projects. RAW footage retains more detail, giving you greater flexibility in color correction and editing. High-resolution footage ensures sharpness and clarity.
b. Leave Room for Cropping
When framing your shots, consider leaving a little extra space around the edges of your composition. This gives you flexibility in post-production to crop or adjust the framing without losing important elements.
c. Capture B-Roll Footage
Always shoot additional footage (B-roll) of your environment, objects, or actions related to your main subject. B-roll can be used to break up scenes, add context, or cover transitions between shots during editing.
Conclusion
Shooting high-quality videos requires mastering a combination of technical elements and creative techniques. From optimizing lighting and stabilizing your camera to using thoughtful composition and controlling audio quality, each step plays a crucial role in capturing stunning visuals. By understanding your camera settings and experimenting with different angles and movements, you can produce engaging, professional-level videos that captivate your audience. With the right techniques and attention to detail, your video projects will stand out and leave a lasting impression.


